Deployment pipeline is a perfect solution to make sure to publish final changes only after proper tests.
How it works on Power BI Service?
On the left sidebar you will see icon (or just click on 3 dots at the bottom) and you will see option “Deployment Pipelines”.

To create new pipeline, just click on the button “New pipeline” and set it’s name.
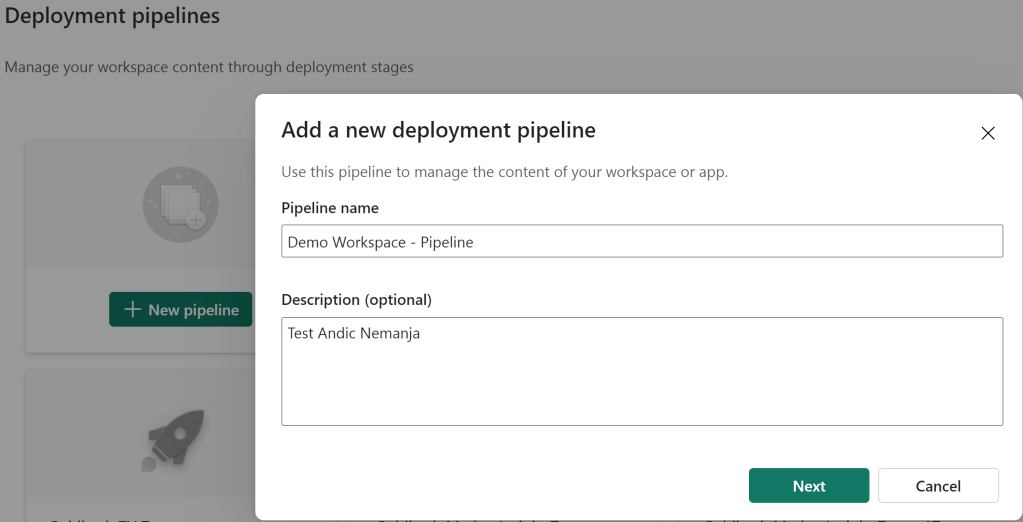
You can then choose how many stages you would like to have in this deployment pipeline.
Example: if you want to have one workspace where developers will test new things and then once it is confirmed to be ok, to publish it to production, you would need two stages: Test and Production.
If you need additional level, for example developers test in one workspace, then business users test in another and then going live to production, you would need all three stages.
The final step is to assign workspace to each stage.
After this short introduction, let’s see how it works.
I assigned existing workspace “Demo Workspace” to Test stage, and new (blank) workspace “Demo Workspace Production” to Production stage.
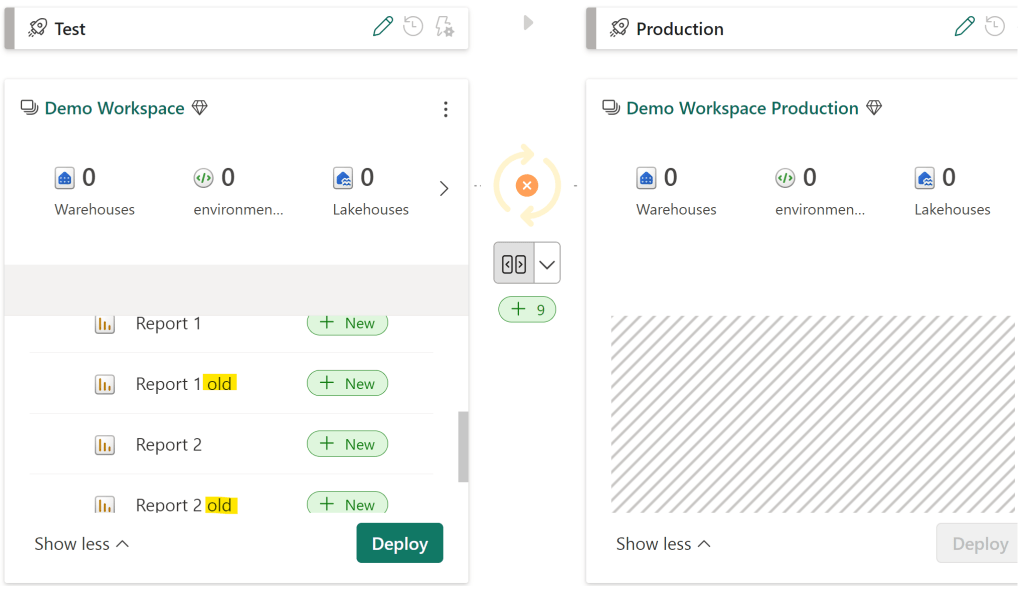
You can see that in Demo workspace i have 2 reports with suffix “old”. These two reports are actually placed within folder “Archive” in this workspace.

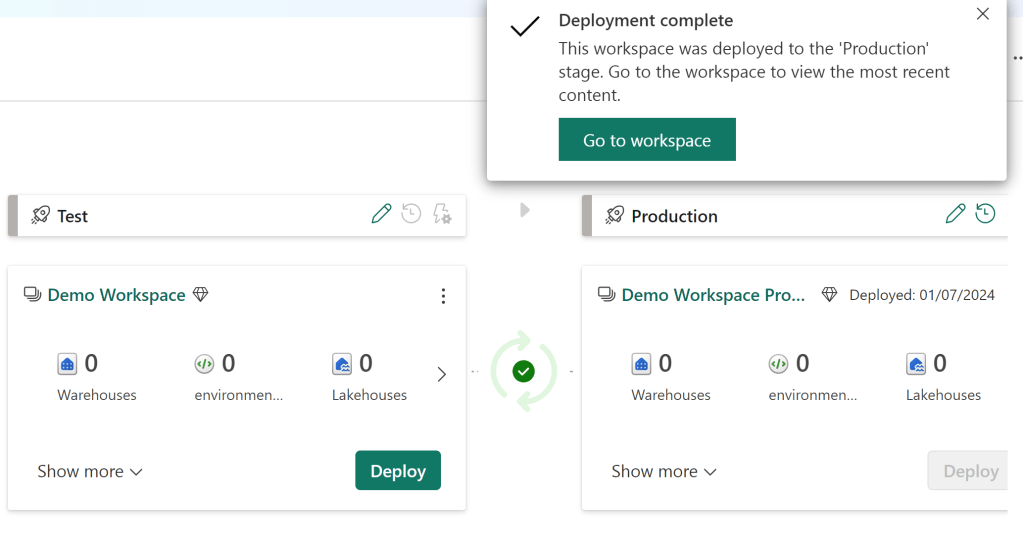
If now i try to deploy everything from workspace “Demo Workspace” to workspace “Demo Workspace Production”, i will go to Deployment pipeline and click on “Deploy” button:
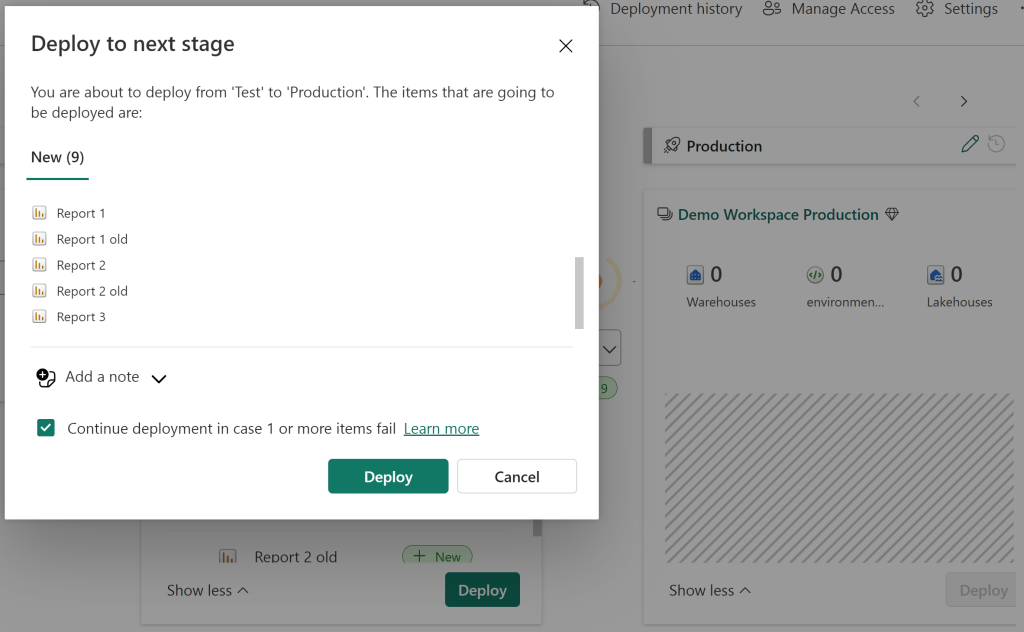
If everything is fine, it will return this message:
Now, let’s now try the opposite direction.
At the moment we have two stages, we want to add additional stage for development.
The goal is to deploy everything from workspace “Demo Workspace” to new workspace “Demo Workspace Development”.
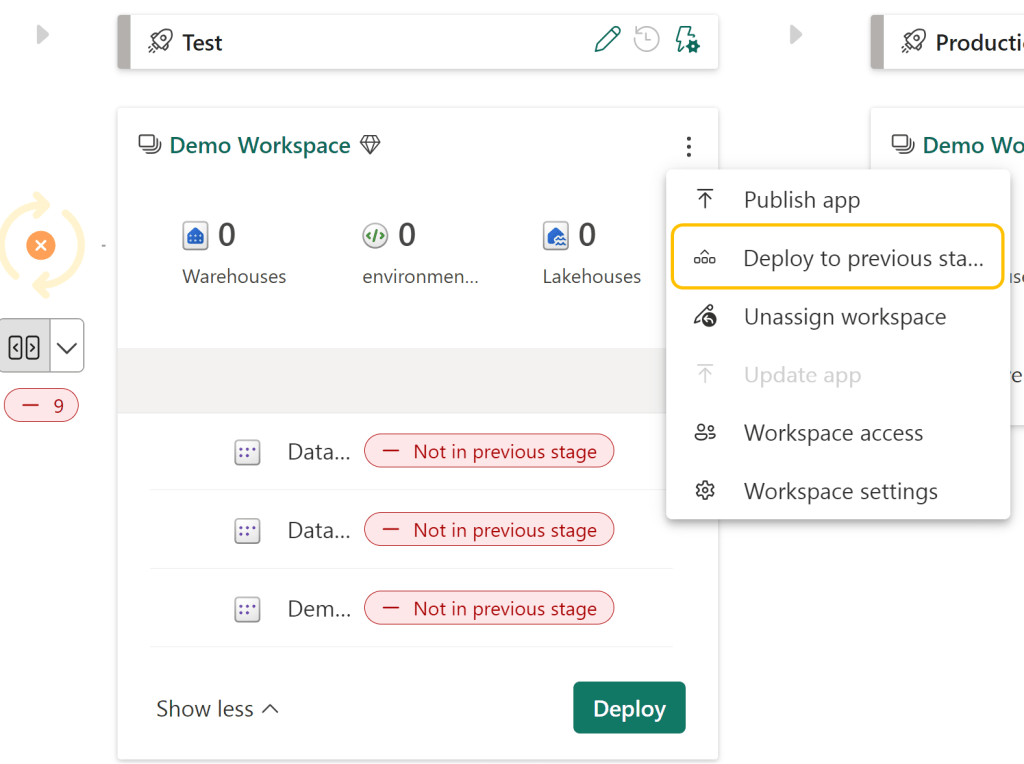
After assigning new workspace to Development stage, we now have this situation, the first stage is empty:

To deploy objects to previous stage, click on three dots besides Test stage name and choose option “Deploy to previous stage”:
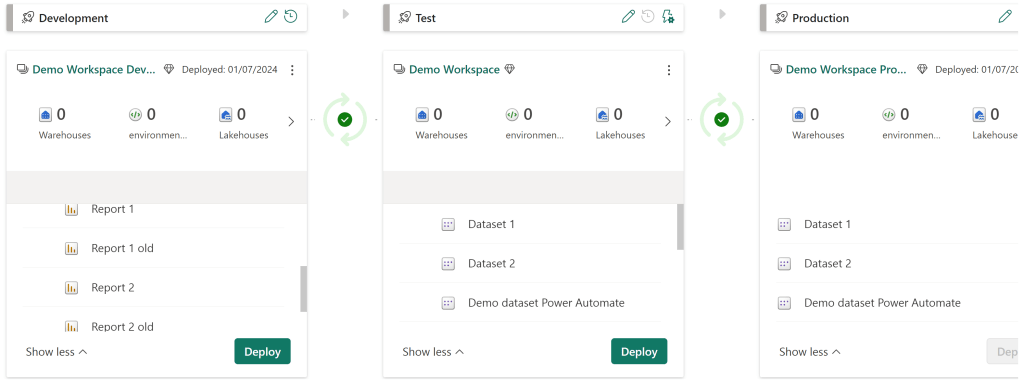
Once it is completed, you will see green checkmark between these three stages. It means that all objects are the same on all stages.
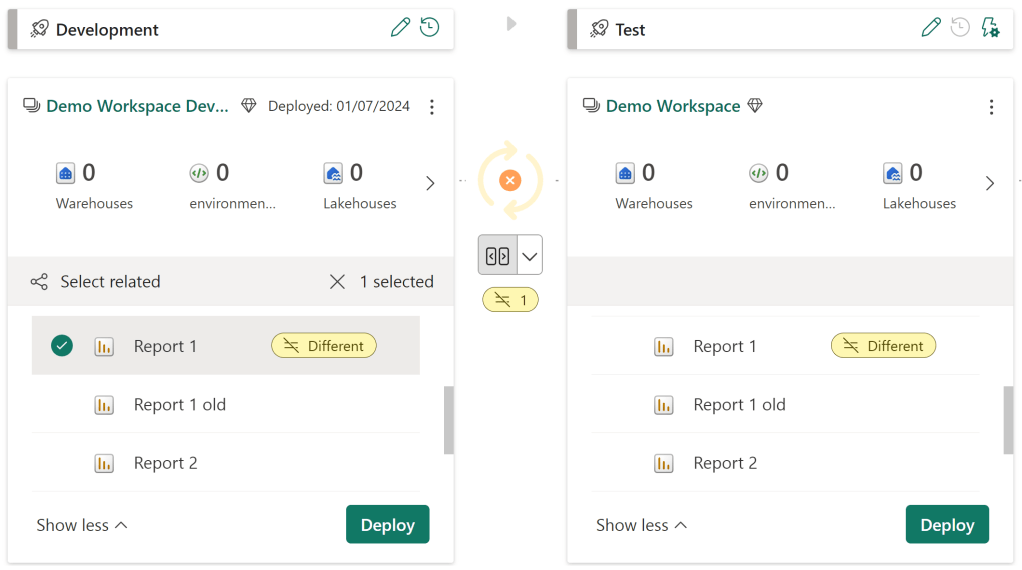
Now i made small change on the “Report 1” on development workspace.
After refreshing deployment pipeline page, i have new alert (orange X icon) meaning there is difference between these two stages.
Clicking on <> arrows below i get information how many objects and which objects are different.

If we want to deploy these changes to Demo Workspace, just click on the left side of Report 1, select it and click on deploy. This is how you can deploy only one or multiple objects instead of whole content of the workspace:
By using deployment pipelines properly, we make sure to always have separate workspaces for each stage. Production workspace, which is the only one to be accessed by end users, will always have updates once everything is tested and confirmed.
And one more benefit. You can document each change when making deployments. On the top of the page there is option “Deployment history“.
Here you will have all information about each deployment: who made deployment, which objects were deployed, all notes, date and time.
Pretty useful Power BI feature!
In the next few posts we will still be focused on Deployment Pipelines, mainly on good things, and things to be aware of.
